Posted (Updated ) in Linux, Uncategorized

I have a bunch of sites in /var/www and need individual user logins with access to their respective sites. In this tutorial I’ll go over how to create a user, chroot jail them and allow access to specific folders (in our case web directories).

For reference I’m using a standard LAMP server on Ubuntu:

1
2
sudo apt-get install -y tasksel
sudo tasksel install lamp-server

but this tutorial will work for any web server configuration.


1. Create User, Assign Web Group

1
2
3
4
5
6
7
# Create the user setting group to www-data
sudo useradd -Ng www-data myuser
sudo passwd myuser
 
# Restrict login to SFTP only
sudo groupadd sftp-only
sudo usermod myuser -G sftp-only


Create their web directory and provide access

With the new user created, make a directory matching their website’s name and mount the real website folder to it:

1
2
3
4
5
6
7
8
9
# Create chroot directory and set permissions
mkdir -p /home/myuser/mysite.com/html
chmod 755 /home/myuser/mysite.com/html
 
# Mount the destination directory at the directory we just created
mount --bind /var/www/mysite.com/html /home/myuser/mysite.com/html
 
# Add the above command to /etc/rc.local to mount it on boot
nano /etc/rc.local


Restrict the user to SFTP Only

We only want to allow SFTP access for this user. First open /etc/passwd and make sure the end of the line has /bin/false like so:

1
2
tail -n1 /etc/passwd
# myuser:x:1001:33::/home/myuser:/bin/false

Now edit /etc/sshd/sshd_config to allow only SFTP myuser:

1
2
3
4
5
Match User myuser
  ChrootDirectory /home/myuser
  ForceCommand internal-sftp
  AllowTcpForwarding no
  X11Forwarding no

Restart the SSHD service:

1
sudo service sshd restart

Now when you try to SSH in with this user you’ll get the error:

This service allows sftp connections only.


That’s it! They should now be able to SFTP in and will only have a mysite.com directory with access to their web files.


Further Reading

mihai.ile’s post on Stack Overflow – How can I chroot sftp-only SSH users into their homes?
Read More »

Posted in Linux

When you create an Amazon EC2 instance, you’re given a .PEM private key allowing for passwordless entry to your server. Losing this key can be pretty costly but below I’ll show how to get you back in again.

The Problem

We’ve lost our PEM key or the one we have isn’t working:

1
2
3
4
5
6
7
8
9
10
11
12
13
14
15
16
17
18
19
20
21
22
23
$  ssh -vvv -i /path/to/my.pem ubuntu@host.com
OpenSSH_6.2p2, OSSLShim 0.9.8r 8 Dec 2011
...
debug2: key: /path/to/my.pem (0x0), explicit
debug1: Authentications that can continue: publickey
debug3: start over, passed a different list publickey
debug3: preferred publickey,keyboard-interactive,password
debug3: authmethod_lookup publickey
debug3: remaining preferred: keyboard-interactive,password
debug3: authmethod_is_enabled publickey
debug1: Next authentication method: publickey
debug1: Offering RSA public key: /Users/me/.ssh/id_rsa
debug3: send_pubkey_test
debug2: we sent a publickey packet, wait for reply
debug1: Authentications that can continue: publickey
debug1: Trying private key: /path/to/my.pem
debug1: read PEM private key done: type RSA
debug3: sign_and_send_pubkey: RSA 99:99:aa:9a:aa:99:99:a9:aa:99:99:99:99:9a:99:aa
debug2: we sent a publickey packet, wait for reply
debug1: Authentications that can continue: publickey
debug2: we did not send a packet, disable method
debug1: No more authentication methods to try.
Permission denied (publickey).


The Plan

We need to set a new authorized_key on our server. To do this we’ll:

  • Create a temporary new EC2 instance (E2) with a new keypair
  • Mount our servers EBS volume to E2
  • Set the authorized_key in our EBS volume to use our new key
  • Reattach the EBS to our original EC2 and log in.


The Implementation

I don’t like big wordy tutorials so here’s a tl;dr of all steps involved:

  • Create a snapshot of your EC2’s (E) EBS volume (V)
  • Create a new volume (V2) from the snapshot
  • Start new t2.micro EC2 Ubuntu instance (E2), using a new key pair
  • Attach V2 to E2, as /dev/xvdf (or /dev/sdf)
  • SSH in to E2
  • 1
    2
    3
    
    sudo mount /dev/xvdf1 /mnt/tmp -t ext4
    cp ~/.ssh/authorized_keys /mnt/tmp/home/ubuntu/.ssh/authorized_keys
    sudo umount /mnt/tmp
  • Detach V2 from E2
  • Stop E
  • Detach V from E
  • Attach V2 to E as /dev/sda1
  • Start E
  • Login as before, using your new .pem file
  • If all is well and you’re in, delete E2 and V

In my personal case, the above didn’t help and I was still getting the error Permission denied (publickey). I had to also copy E2‘s sshd_config because I’d borked E‘s and it was the actual reason I couldn’t SSH in.

So before the umount line above, also do:

1
2
3
sudo cp /etc/ssh/sshd_config /mnt/tmp/etc/ssh/sshd_config
mkdir /mnt/tmp/home/ubuntu/.ssh/bak
mv /mnt/tmp/home/ubuntu/.ssh/id_rsa /mnt/tmp/home/ubuntu/.ssh/id_rsa.pub /mnt/tmp/home/ubuntu/.ssh/known_hosts /mnt/tmp/home/ubuntu/.ssh/bak

Hope this helps.

Read More »

Posted (Updated ) in Uncategorized

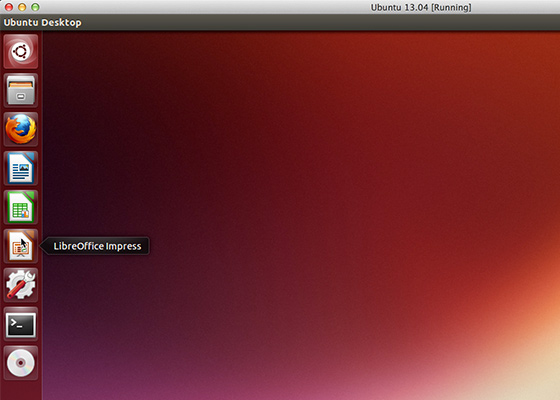
I just installed Ubuntu 13.04 in Virtualbox 4.2.16 and found much to my annoyance that the VM thought my mouse was a little higher than it actually was:

Ubuntu thinks my mouse is a little higher than it actually is

It turns out this is caused by having 3D acceleration turned on in VM Settings – Display window. After doing a bit of sleuthing I came across a forum post on virtualbox.org with a command that did the trick nicely.

Simply open a terminal and run

VBoxManage setextradata global GUI/Customizations noStatusBar

Restart your VM and voila. Perfect mouse working with 3D acceleration!

Mouse Y-Axis working as it should

Read More »

Posted (Updated ) in Linux

This morning I noticed one of my drives wasn’t mounted so I attempted to mount manually and got the following error message:

$ sudo mount /dev/sdi1 /mnt/my_drive/

mount: wrong fs type, bad option, bad superblock on /dev/sdi1,
missing codepage or helper program, or other error
In some cases useful info is found in syslog – try
dmesg | tail or so

Strange. Following the messages advice I checked out dmesg:

$ dmesg | tail

[ 213.962722] EXT4-fs (sdi1): no journal found


The Solution

If this happens to you, you can ignore the error and mount in readonly mode using the following command:

sudo mount -o loop,ro,noexec,noload /dev/sdi1 /mnt/your_broken_partition/

Thanks to Computer Forensics for their useful post on this issue.

ALWAYS BACKUP YOUR DATA

Read More »

Posted (Updated ) in Linux

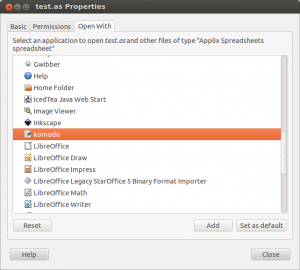
It seems Gnome 3 removed the button allowing users to add specified applications into the ‘Other Applications’ list under ‘Open With’ in file properties. Until the functionality is restored, you can add applications manually by doing the below:

cp /usr/share/applications/gedit.desktop ~/.local/share/applications/your_app.desktop

Modify the contents of your_app.deskop to look something like the below:

[Desktop Entry]
Name=your_app
GenericName=Your App
Comment=Edit text files
Keywords=Plaintext;Write;
Exec=your_app %U
Terminal=false
Type=Application
StartupNotify=true
MimeType=text/plain;
Icon=/path/to/icon.png
Categories=GNOME;GTK;Utility;TextEditor;
Actions=Window;Document;
X-Ubuntu-Gettext-Domain=your_app

You can copy any .desktop file from /usr/share/applications so pick the one that closest resembles the application you’re adding. Below you can see komodo added to mine:

Komodo has been added to my 'Open With' list
Komodo has been added to my ‘Open With’ list

Read More »

Posted in Linux, PHP

I’ve been looking for ways to speed up my site recently and came across this interesting article on seamlessly integrating nginx with Apache to handle asset files without requiring a CDN subdomain. This works by checking the requests file extension for .js, .jpg, .pdf etc and if not found, proxies the request to Apache and serves the results.

Benefits

You won’t need to modify all your pages/posts updating asset locations to point to a subdomain! Everything will ‘just work’.

Issues/Drawbacks

There are 2 issues I’ve found with this setup:

  • Because Apache is now running on port 8080, your mod_rewrite redirects will now redirect to that port. You won’t be able to use RedirectMatch anymore, however below is the solution I came up with:
    sudo apt-get install nginx
    sudo nano/etc/nginx/sites-available/default
  • You can no longer use .htaccess redirects for any asset files nginx is serving. Instead, use nginx redirects. Below is an example:
    1
    2
    3
    4
    5
    6
    7
    8
    9
    10
    11
    12
    13
    14
    15
    16
    17
    18
    19
    20
    21
    22
    23
    24
    25
    26
    27
    28
    29
    30
    31
    32
    33
    34
    35
    36
    37
    38
    39
    40
    41
    42
    43
    44
    45
    46
    47
    48
    49
    50
    51
    52
    53
    
    # You may add here your
    # server {
    #	...
    # }
    # statements for each of your virtual hosts
     
    server {
     
    	listen   80; ## listen for ipv4
    	listen   [::]:80 default ipv6only=on; ## listen for ipv6
     
    	server_name  localhost;
    	root /var/www/; 
    	access_log  /var/log/nginx/localhost.access.log;
     
    	# Static Contents
    	location ~* ^.+.(jpg|jpeg|gif|png|ico|css|zip|tgz|gz|rar|bz2|doc|xls|exe|pdf|ppt|txt|tar|mid|midi|wav|bmp|rtf|js)$ {		access_log off;
    		expires 30d;
    	}
     
    	# Dydamic Content forward to Apache
    	location / {
            	proxy_set_header X-Real-IP  $remote_addr;
    	        proxy_set_header Host $host;
            	proxy_set_header X-Forwarded-For $proxy_add_x_forwarded_for;
    	        proxy_pass http://127.0.0.1:8080;	}
    }
     
    ###############################################################################
    # virtualhost
    ###############################################################################
     
    #server {
    #    server_name www.example.com example.com;
    #    root /var/www/example.com/html/;
    #
    #    # Static Contents
    #    location ~* ^.+.(jpg|jpeg|gif|png|ico|css|zip|tgz|gz|rar|bz2|doc|xls|exe|pdf|ppt|txt|tar|mid|midi|wav|bmp|rtf|js)$ {
    #        access_log off;
    #        expires 30d;
    #    }
    #
    #    # Dydamic Content forward to Apache
    #    location / {
    #        proxy_set_header X-Real-IP  $remote_addr;
    #        proxy_set_header Host $host;
    #        proxy_set_header X-Forwarded-For $proxy_add_x_forwarded_for;
    #        proxy_pass http://127.0.0.1:8080;
    #    }
    #}

    For more information on nginx redirects, see the official documentation.

Read More »

Posted in Linux
Pidgin Attention button successfully hidden

Ever since the developers added the Attention button to Pidgin, one of the most common questions asked is how to remove it. I finally set some time aside to answer this question.

  • Download the plugin that does exactly this from the Pidgin developer page.
  • Install the Pidgin developer dependencies if you haven’t already:
    sudo apt-get install ubuntu-dev-tools subversion g++ pidgin-data libpurple0 libpurple-dev pidgin-dev libgtk2.0-dev

    This step is important or you’ll receive errors like the following:

    $ make
    [CC] hide_attention_button.o
    Package pidgin was not found in the pkg-config search path.
    Perhaps you should add the directory containing `pidgin.pc'
    to the PKG_CONFIG_PATH environment variable
    No package 'pidgin' found
    Package purple was not found in the pkg-config search path.
    Perhaps you should add the directory containing `purple.pc'
    to the PKG_CONFIG_PATH environment variable
    No package 'purple' found
    Package gobject-2.0 was not found in the pkg-config search path.
    Perhaps you should add the directory containing `gobject-2.0.pc'
    to the PKG_CONFIG_PATH environment variable
    No package 'gobject-2.0' found
    Package gtk+-2.0 was not found in the pkg-config search path.
    Perhaps you should add the directory containing `gtk+-2.0.pc'
    to the PKG_CONFIG_PATH environment variable
    No package 'gtk+-2.0' found
    hide_attention_button.c:24:20: fatal error: plugin.h: No such file or directory
    compilation terminated.
    make: *** [hide_attention_button.o] Error 1
  • Drop the .c and Makefile into a folder and in a terminal run the following commands:
    make
    sudo make install

    If all went well you’ll see:

    $ make
    [CC] hide_attention_button.o
    [SHLIB] hide_attention_button.so
    $ sudo make install
    mkdir -p /`pkg-config --variable=prefix purple`/lib/purple-2
    install hide_attention_button.so /`pkg-config --variable=prefix purple`/lib/purple-2

Restart pidgin and enable the plugin under Tools – Plugins – Hide Pidgin Attention Button.

Close but not Perfect

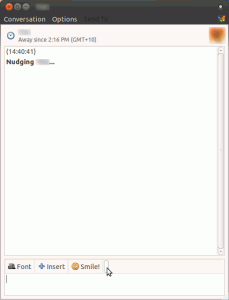
Although this plugin really does hide your Attention button, it still exists if you hover over where it used to be:

The button is much smaller but still clickable

At least it’s much smaller now and less likely to be accidentally clicked!

Read More »

Posted (Updated ) in Linux

For users not running Bumblebee or Ironhide, you’ve probably noticed alot of heat, low battery life and a roaring fan even when idle. This is almost entirely due to the nVidia graphics card. If you’re like me and don’t need that card at all, you have the option of disabling it entirely. To do so you’ll need to install acpi_call as a kernel module and use it to shut the GPU down.

Read on for a tutorial on how. I’ve also included some bonus Intel GPU tweaks!

Read More »

Posted (Updated ) in Linux

Note: Also see the prequel to this post: Why I Hate Unity

As your typical Ubuntu user, I find Unity infuriating and have devoted countless hours towards bringing back the usability and functionality that came with Gnome 2. I’ve racked up quite a few tweaks so far that have gone a long way towards doing this and figured it was about time to share them. My aim was to make 11.10 look and feel exactly like 10.10. I’ve attached below a screenshot of the final result.

11.10 with Gnome Session Fallback

Read More »

Posted (Updated ) in Linux

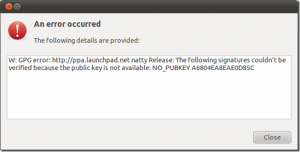
This is an issue that plagues me constantly. For each PPA you add to Ubuntu, you also need to import a GPG key for it. This is all fine and well – until don’t have the key and are unsure how to get it (often happens after a reformat). Try doing an update without a valid key and you’ll get the following:

BSOD - Ubuntu Updates style
BSOD – Ubuntu Updates style
W: GPG error: The following signatures couldn’t be verified because the public key is not available: NO_PUBKEY

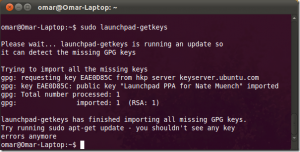
Well we finally have a solution: launchpad-getkeys! This handy little tool will automatically determine which PPA’s require GPG keys and import them for you.

Finally. Sweet relief!

Install with:

sudo apt-add-repository ppa:nilarimogard/webupd8
sudo apt-get update
sudo apt-get install launchpad-getkeys

Run with:

sudo launchpad-getkeys

Images taken from this howtogeek article. For more information see here and here.

Read More »