The below is a collaboration of useful information I’ve found while attempting to build and maintain a RAID5 array consisting of 4 HDDs. This tutorial is a work in progress and I’m learning everything as I go. I’ve left relevant links in each section for more information and if you spot anything that could be done better or that I’m missing let me know in the comments below!
A few useful commands to get us started:
- lsblk to see mount points
- df -T to see file systems and
- sudo fdisk -l to see partition types
Format and partition drives
http://www.flynsarmy.com/2012/11/partitioning-and-formatting-new-disks-in-linux/
http://www.ehow.com/how_5853059_format-linux-disk.html
http://www.allmyit.com.au/mdadm-growing-raid5-array-ubuntu
Make sure all disks are umounted:
First step is to format and partition our drives to prepare them for the array. I’m using four 2TB SATA drives.
lsblk # Mine are sdb sdc sdd and sde sudo umount /media/sdb sudo umount /media/sdc sudo umount /media/sdd sudo umount /media/sde |
Delete all partitions and create new Linux RAID autodetect partitions
RAID disks require RAID autodetect partitions. These can be made with fdisk:
sudo fdisk /dev/sdb d #until all deleted n #use defaults t #change partition type fd #Linux RAID autodetect type |
Repeat the above for each drive
Partition to EXT4
I’m using EXT4 for my array.
sudo mkfs.ext4 sdb1 sudo mkfs.ext4 sdc1 sudo mkfs.ext4 sdd1 sudo mkfs.ext4 sde1 |
Create the Array
http://ubuntuforums.org/showthread.php?t=517282
http://blog.mbentley.net/2010/11/creating-a-raid-5-array-in-linux-with-mdadm/
As mentioned above I’m using four drives and making a RAID5 array.
sudo mdadm --create /dev/md0 --level=5 --raid-devices=4 /dev/sdb1 /dev/sdc1 /dev/sdd1 /dev/sde1 watch -n3 cat /proc/mdstat |
This will take several hours depending on number and size of hdds. When done you should see
Personalities : [linear] [multipath] [raid0] [raid1] [raid6] [raid5] [raid4] [raid10]
md0 : active raid5 sde1[4] sdd1[2] sdc1[1] sdb1[0]
5860145664 blocks super 1.2 level 5, 512k chunk, algorithm 2 [4/4] [UUUU]
Reboot and the array will have disappeared. Find the new location:
cat /proc/mdstat |
Mine had for some reason been replaced with /dev/md127:
Personalities : [raid6] [raid5] [raid4] [linear] [multipath] [raid0] [raid1] [raid10] md127 : active raid5 sde1[4] sdc1[1] sdd1[2] sdb1[0] 5860145664 blocks super 1.2 level 5, 512k chunk, algorithm 2 [4/4] [UUUU] |
Type
sudo mdadm --assemble --scan sudo mdadm --detail --scan |
and paste the output at the bottom of /etc/mdadm/mdadm.conf. Mine looked like
ARRAY /dev/md/xbmc:0 metadata=1.2 name=xbmc:0 UUID=3dcfe843:c2300a40:75190922:f6caf9c7
Add your array from /proc/mdstat (in my case /dev/md127) to fstab like so:
/dev/md127 /media/md127 ext4 defaults 0 0 |
Reboot.
Failed Arrays
I wanted to test a repair so I pulled a drive and plugged it back in. Alternatively you could use
mdadm -manage -set-faulty /dev/md127 /dev/sdb1 |
Doing a
sudo mdadm --query --detail /dev/md127 |
on the newly failed array showed:
/dev/md127:
Version : 1.2
…
State : clean, degraded
Active Devices : 3
Working Devices : 3
Failed Devices : 0
Spare Devices : 0Layout : left-symmetric
Chunk Size : 512KName : xbmc:0 (local to host xbmc)
UUID : 3dcfe843:c2300a40:75190922:f6caf9c7
Events : 610Number Major Minor RaidDevice State
0 8 17 0 active sync /dev/sdb1
1 8 33 1 active sync /dev/sdc1
2 0 0 2 removed
4 8 49 3 active sync /dev/sdd1
Notice the State is now set to ‘clean, degraded’.
Email Notifications
First and foremost you want to be notified by email about failed arrays. Open /etc/mdadm/mdadm.conf and set the MAILADDR line to your email address. When arrays fail you’ll now receive an email like the following:
This is an automatically generated mail message from mdadm
running on xbmcA DegradedArray event had been detected on md device /dev/md/xbmc:0.
Faithfully yours, etc.
P.S. The /proc/mdstat file currently contains the following:
Personalities : [raid6] [raid5] [raid4] [linear] [multipath] [raid0] [raid1] [raid10]
md127 : active raid5 sdf1[5] sdd1[4] sdc1[1] sdb1[0]
5860145664 blocks super 1.2 level 5, 512k chunk, algorithm 2 [4/3] [UU_U]
[===========>………] recovery = 59.5% (1163564104/1953381888) finish=184.5min speed=71313K/secunused devices: <none>
Physically Locating the faulty disk
http://askubuntu.com/questions/11088/how-can-i-physically-identify-a-single-drive-in-a-raid-array
Always have a diagram written up beforehand showing the location of each drive and their UUID/serial number! This is the best method.
If you haven’t done the above a nice way to determine which disk is faulty if you know the /dev/sdx association (using cat /proc/mdstat should do the trick, or lsscsi -l might help) is by doing a
cat /dev/sdx >/dev/null |
and seeing which LED light blinks madly out front of your machine.
Here’s a script I whipped up to output /dev location, UUID and model numbers of each drive:
for disk in `sudo fdisk -l | grep -Eo '(/dev/[sh]d[a-z]):' | sed -E 's/://'`; do uuid=`sudo blkid /dev/sdb1 | grep -Eo 'UUID="([^"]+)"'` model=`sudo hdparm -i $disk | grep -Eo 'SerialNo=.*' | sed -E 's/SerialNo=//';` echo "$disk $uuid model='$model'" done |
Output:
/dev/sdc UUID=”3dcfe843-c230-0a40-7519-0922f6caf9c7″ model=’W -DCWYA00667790′
/dev/sdb UUID=”3dcfe843-c230-0a40-7519-0922f6caf9c7″ model=’W -DCWYA00186517′
/dev/sdd UUID=”3dcfe843-c230-0a40-7519-0922f6caf9c7″ model=’W -DCWYA00677873′
/dev/sde UUID=”3dcfe843-c230-0a40-7519-0922f6caf9c7″ model=’W -DCWYA00879590′
/dev/sdf UUID=”3dcfe843-c230-0a40-7519-0922f6caf9c7″ model=’W -DCWYA00878581′
Repairing a failed Array
http://nst.sourceforge.net/nst/docs/user/ch14.html
http://ubuntuforums.org/showthread.php?t=1615374
http://www.techrepublic.com/blog/networking/testing-your-software-raid-be-prepared/387
Do an
ls /dev | grep sd |
to find the newly plugged in drive (in my case /dev/sdf) and add the partition on the drive to your raid array (You may have to format/partition as described in the Format and partition drives section above):
sudo mdadm /dev/md127 -a /dev/sdf1 # mdadm: added /dev/sdf1 |
Monitor your progress with
watch -n3 cat /proc/mdstat |
I made the mistake of reading from the drive before it’d started repairing. This apparently lowers the repair speed to the bare minimum – mine was going to take 22 days! To fix this become root and run
echo 100000 > /proc/sys/dev/raid/speed_limit_min echo 400000 > /proc/sys/dev/raid/speed_limit_max |
GUI Management
http://michal.karzynski.pl/blog/2009/11/18/mdadm-gui-via-webmin/
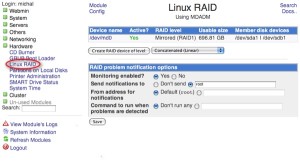
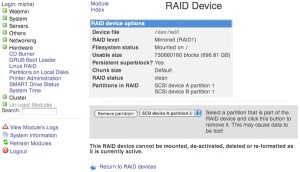
While researching I came across webmin. It’s free, easy to install and offers a fair bit of functionality right from the browser. I haven’t used it to do any actual modifications yet but it seems to have all the functionality you need and a bunch of other useful stuff such as a web console, apt updates and apache/proftpd administration. I highly recommend checking it out.
Other Useful Links
udevinfo for Ubuntu
http://ubuntuforums.org/showthread.php?t=1265469
Grow a raid array
http://www.allmyit.com.au/mdadm-growing-raid5-array-ubuntu
Changing /dev locations
http://unix.stackexchange.com/questions/56267/ubuntu-software-raid5-dev-devices-changed-will-mdadm-raid-break
Re-adding drives – Write-Intent Bitmaps
https://raid.wiki.kernel.org/index.php/Write-intent_bitmap

