For something that should be simple, importing a model from VRoid Studio into Unreal Engine 4 as of the time of writing is extremely convoluted and time consuming – even with the great tools that have been created to speed up the process.
Below I’ll attempt to walk through every step I took to get things looking and working correctly as well as documenting my struggles along the way. Our basic workflow will be VRoid -> Blender -> Unreal.
I should note that as of the time of writing, the latest version of each of the pieces of software I’ll be using are as follows:
1 – Export from VRoid Studio
We start with VRoid. For this tutorial I’ll just be using the Sendagaya Shino default model with one minor modification. I’ll leave you guessing as to what that might be.
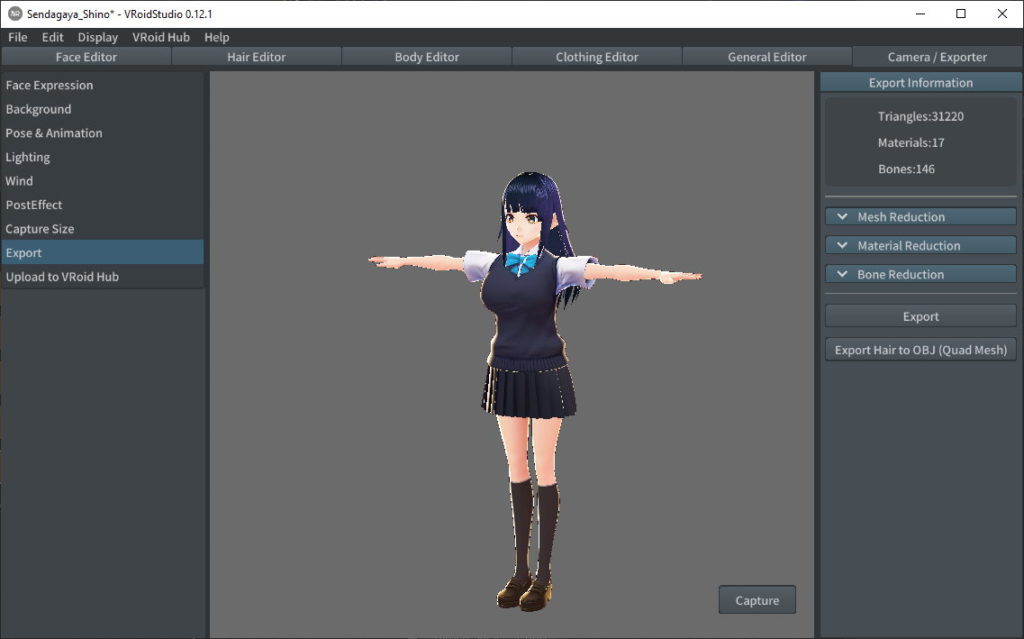
There’s not a lot to do here. One thing that will be useful for later is to go to the Hair Editor tab and take note of your hair base colour. This will need to be manually plugged in once we reach the UE import step.
Head to Camera / Exporter tab at the top and Export tab on the left. Don’t worry about mesh/material/bone reduction – we’ll handle that stuff in Blender in a bit. Hit the export button to save a .vrm file.
2 – Import into Blender
Blender can’t natively import vrm files. This is our first roadblock.
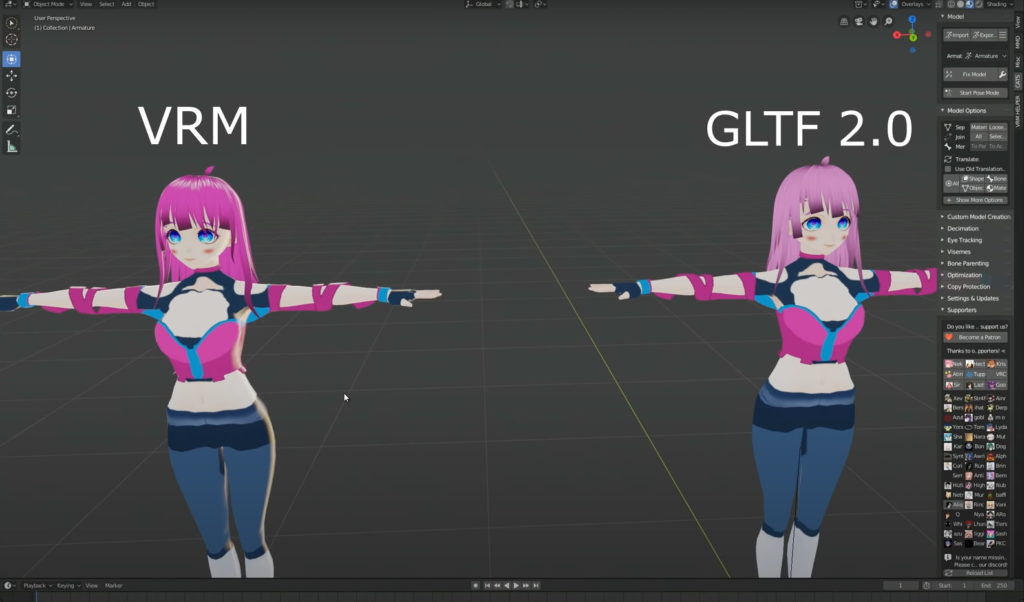
A few tutorials I read/watched said to simply change the file extension of the .vrm we just created to .glb and import (Blender supports glTF). Don’t do this! VRM is an extension of the glTF format with some added goodies that you’ll miss out on by doing so. Below is a screenshot taken from this helpful video on the difference. Notice the highlights in her hair.
Add VRM support to Blender
To add VRM support to Blender, go to Cats Blender Plugin page on GitHub – Releases on the right and download the zip of the latest release. Back in Blender go to Edit – Preferences – Addons and click the Install button at the top. Browse to Cats and once installed, check the checkbox on the left to enable it.
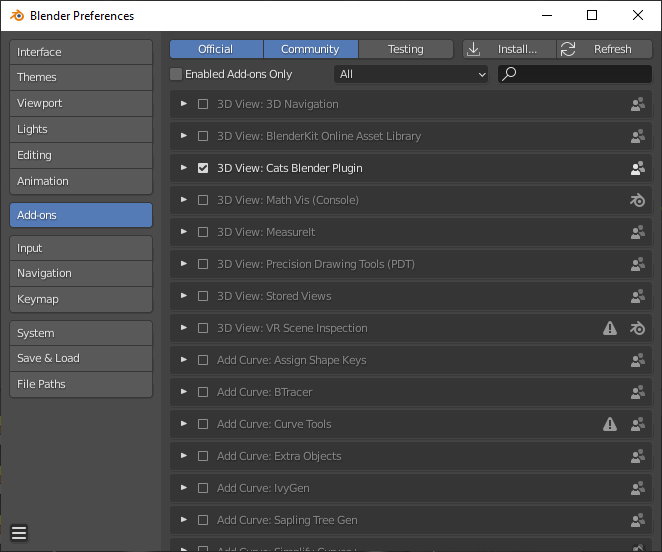
While you’re importing plugins, Cats makes use of an additional Blender plugin material-combiner-plugin. This ones useful because VRoid tends to add a tonne of materials to your model. Download the latest material-combiner-plugin release and install and enable it the same way as above. More information about this plugin can be read on the vrcats forum.
Import our VRM
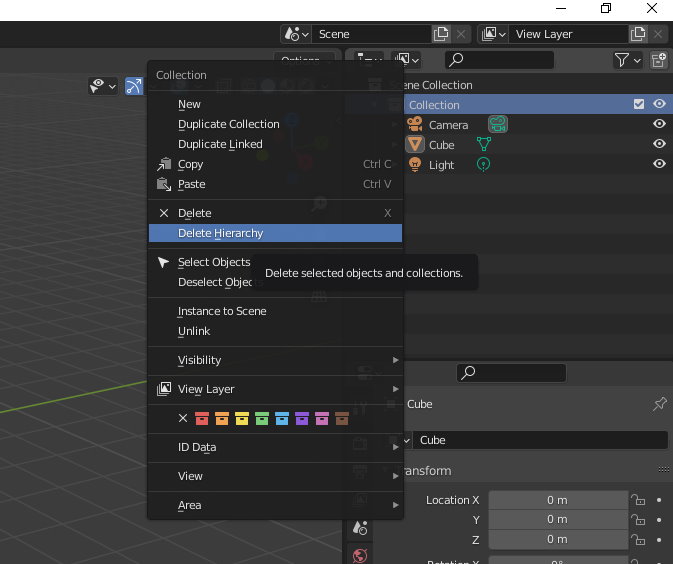
With Cats installed, back in the main Blender window at the top right in the outliner under Scene Collection, right click on Collection and click Delete Hierarchy to delete everything in your scene and give you a blank slate for importing your model.
Now for the VRM import. On the left side of the outliner will be a small arrow pointing left. Click it and go to the CATS tab.
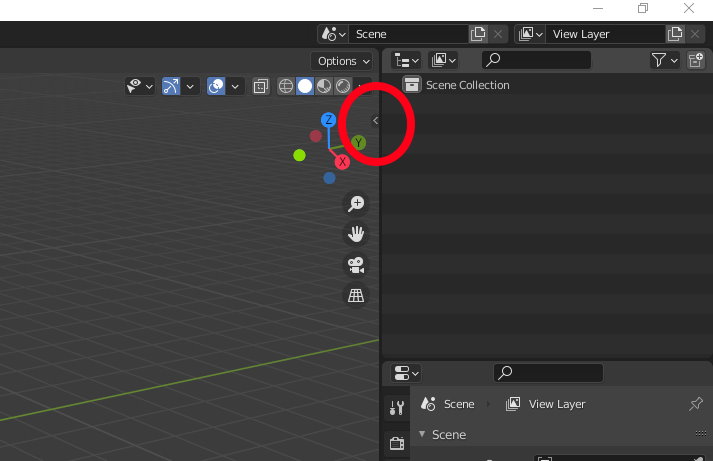
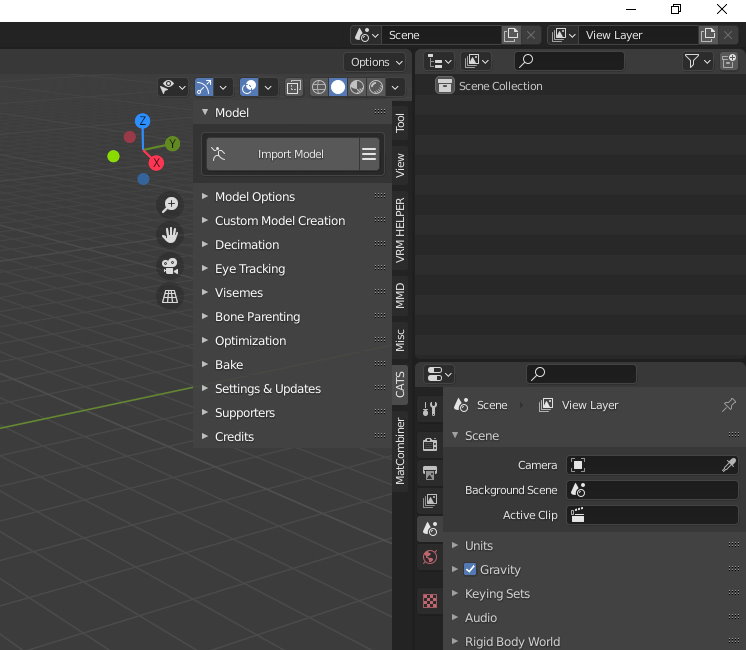
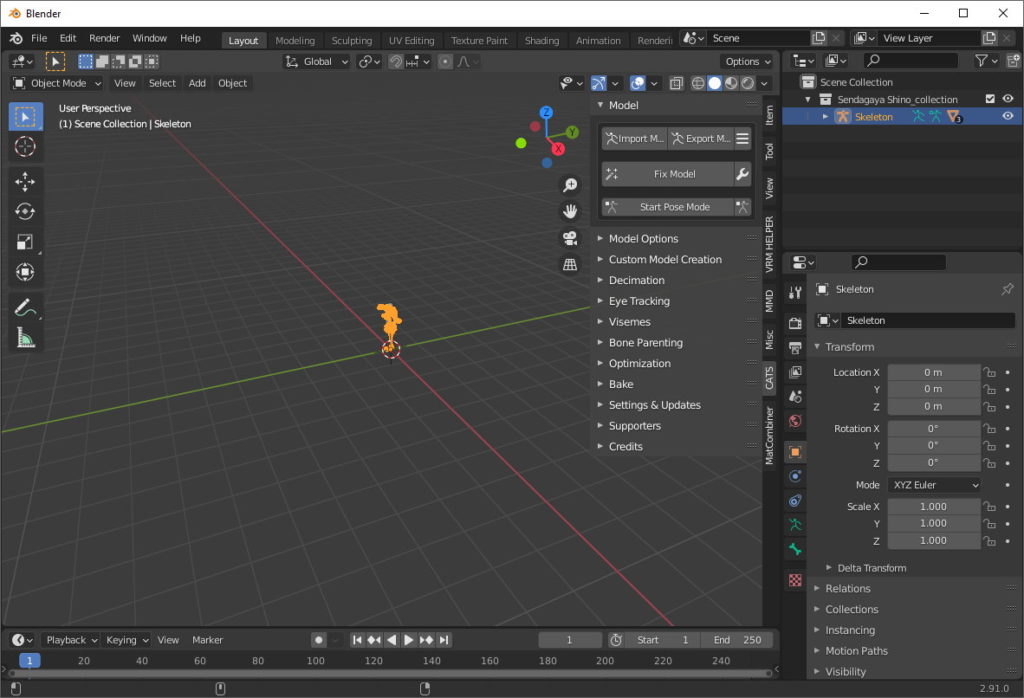
Click Import Model and find your VRM. Blender will chug away for a bit before displaying your model.
Optimize the Model
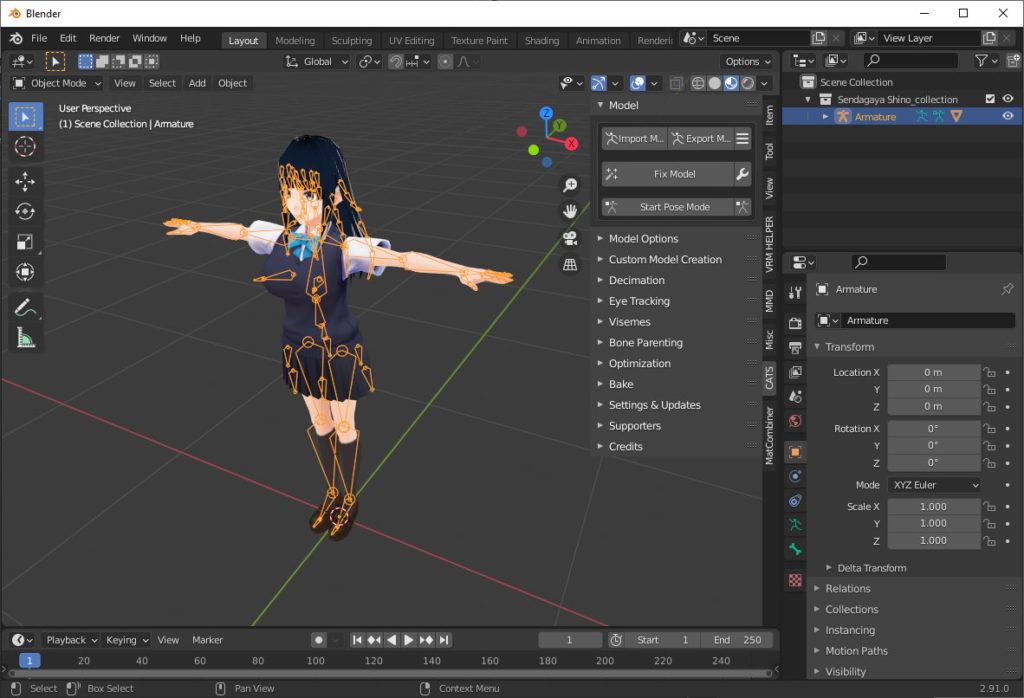
Your high-poly model is now in Blender and it’s time to fix it. Luckily Cats automates this process for you. Click Fix Model, wait for the chugging to finish and optionally use the Decimation tab to lower your poly count.
Combine Materials
If you click Export Model now you might get a warning about having too many materials:
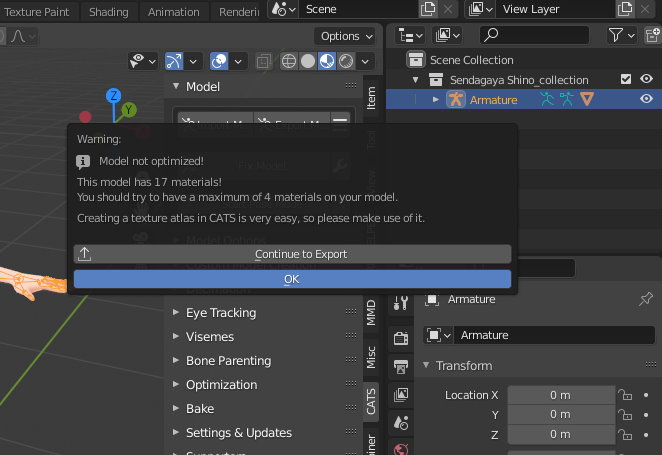
For this model, I needed to combine my materials in a specific way. Open the Optimization tab, and under Atlas click Generate Material List. To help see the material names it may help to widen the panel which you can do by simply dragging the edge of it left. My model includes 17 materials and I combined them like so:
- Eyeline/Eyelash/Eyebrow together
- Eye Iris, Eye Highlight, Eye Extra together
- Main Hair, Hair Back kept individual
- Everything else grouped together
The reason for this specific setup is because some additional steps will be required to get them looking right once imported into UE and I’ve grouped them based on the steps required – eyelines etc must be made translucent and the hair base colur applied, eyes just need the translucency, main and back hair are special cases and the rest can pretty much be left as-is. I’ll explain in more detail after we import into UE. For now just blindly follow my instructions, peon!
Uncheck HAIR_01, FaceEyeline, FaceEyelash, FaceBrow, EyeIris, EyeHighlight, EyeExtra, HairBack and click Save Atlas to.. button. Create a folder called Atlas and save to there. A new material_atlas_* material will be added to your list. Rename it to material_atlas_other.
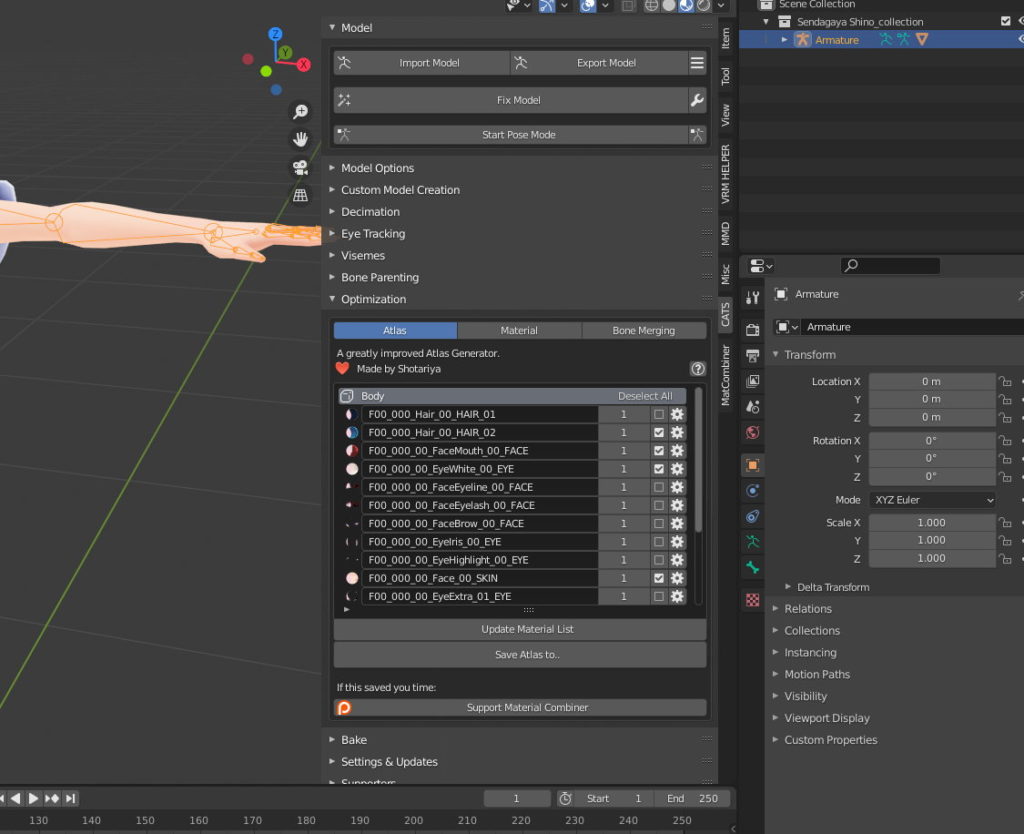
Check FaceEyeline, FaceEyelash, FaceBrow and Save Atlas to.. again. Save to your Atlas folder. Rename your new atlas material to material_atlas_eyehair. Do the same for EyeIris, EyeHighlight and EyeExtra. Name it material_atlas_eyes. You should just be left with the two hair and your new atlas materials.
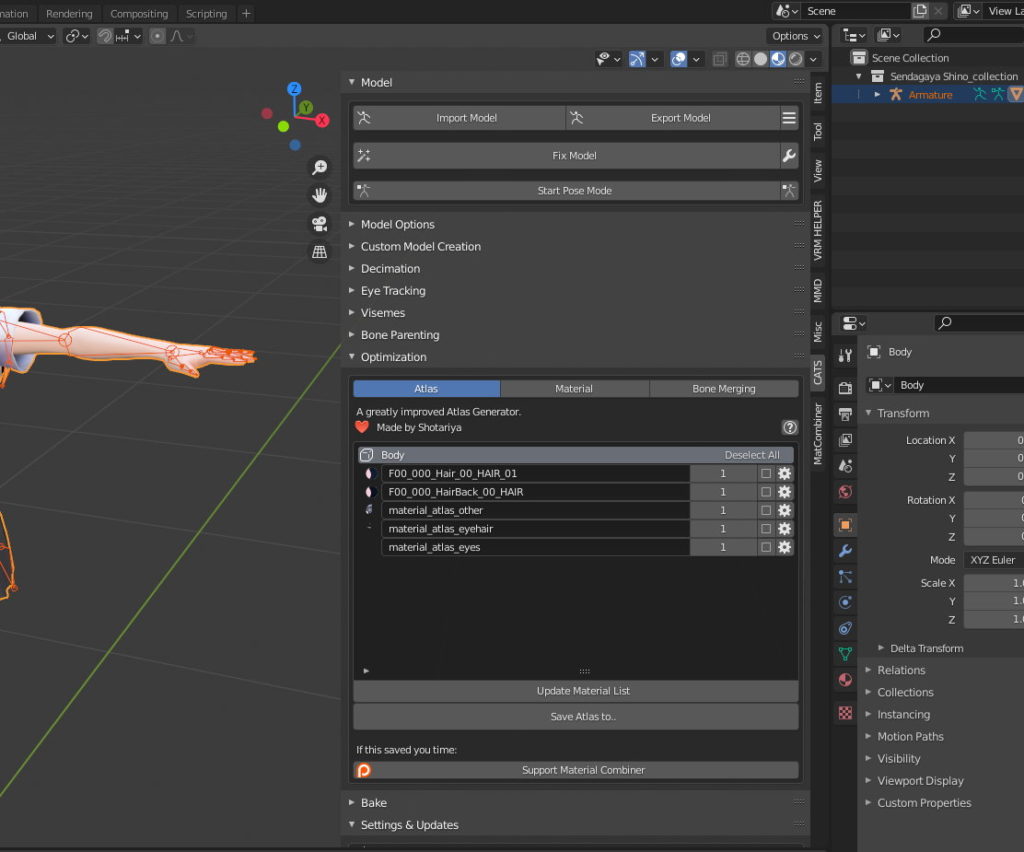
Export the FBX
Minimize the Optimizaton tab and before exporting, open the Settings & Updates tab and check Embed Textures on Export. Now back up at the top of the panel hit Export Model and save your FBX. This time, ignore the material warning and click Continue to Export. In the window that pops up just leave everything as-is and click Export FBX.
3 – Import into Unreal Engine
It’s time to import into UE. Don’t get too excited – this is the most finnicky part of the process.
Drag your FBX into the UE Content Browser in a folder of your choice. The FBX Import Options window will pop up. Leave everything default except under the Transform section set Import Uniform Scale to 100. Don’t ask me why but the FBX is only 1/100th scale. Click Import All
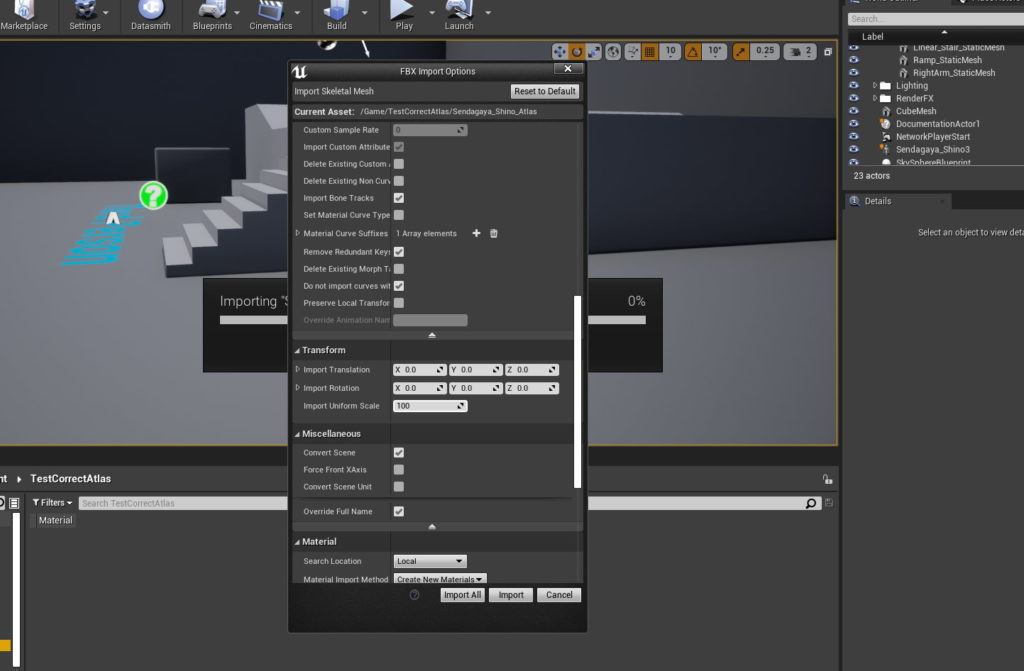
A bunch of files will be imported. Drag your new Skeletal Mesh into your scene and OH GOD WHAT HAVE WE CREATED!?
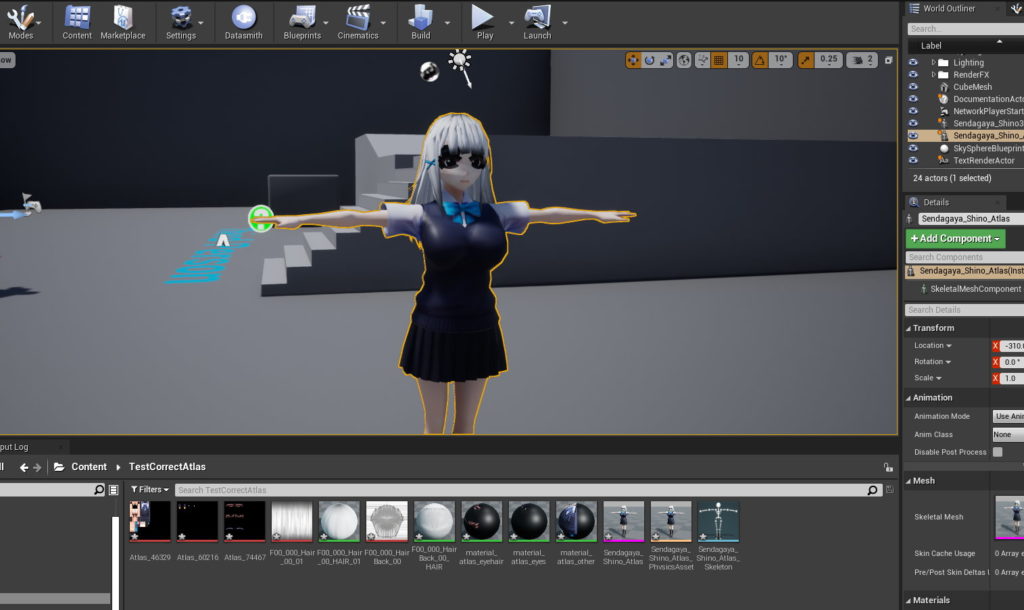
The reason this hideous monstrosity looks the way she does is because her eyelines/eyelashes/eyebrows have no transparency and her hair texture isn’t set up correctly. Unfortunately this seems to be a limitation of the FBX format and unreal import functionality. Let’s get to fixing.
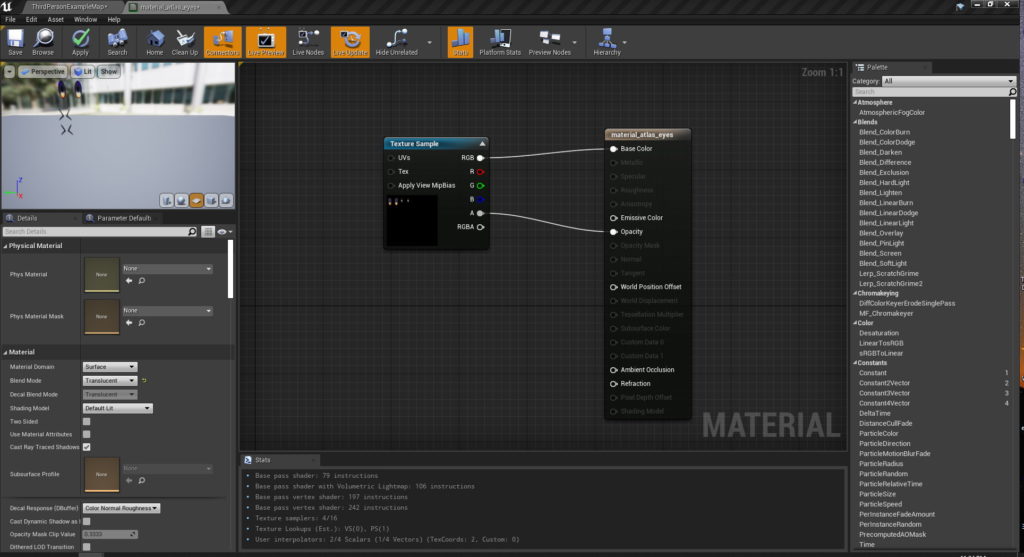
Double click the material_atlas_eyes material. This will open the material editor. Click on the material_atlas_eyes node and in the Details panel on the left set the Blend Mode to Translucent. Now plug your texture samples alpha channel into the new Opacity pin. Your preview on the top left should start looking a lot better. Hit Save up top and close the material editor.
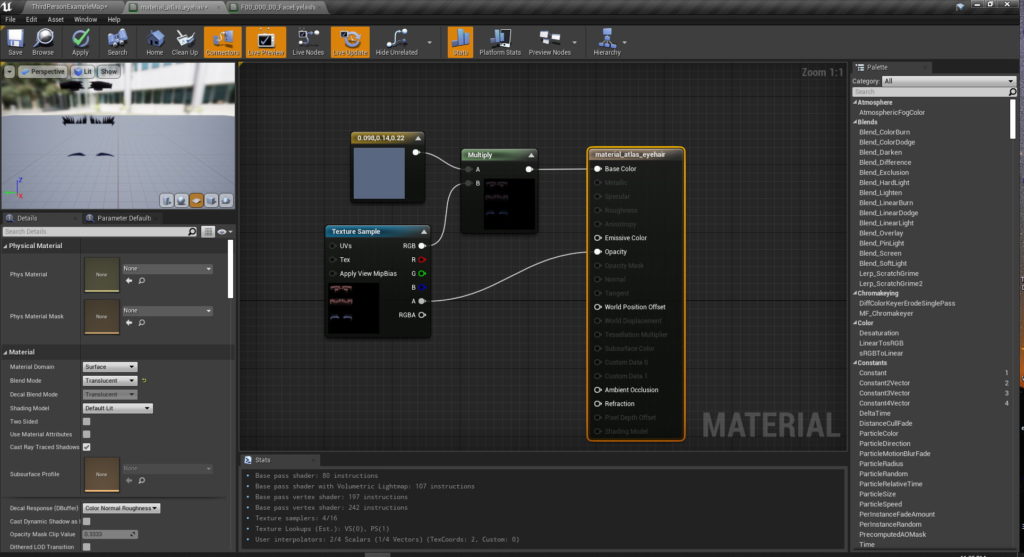
Next up is material_atlas_eyehair. Do the same for this one but also multiply the base colour by your hair colour (recorded waaay back in VRoid in step 1) with a constant3vector node like so:
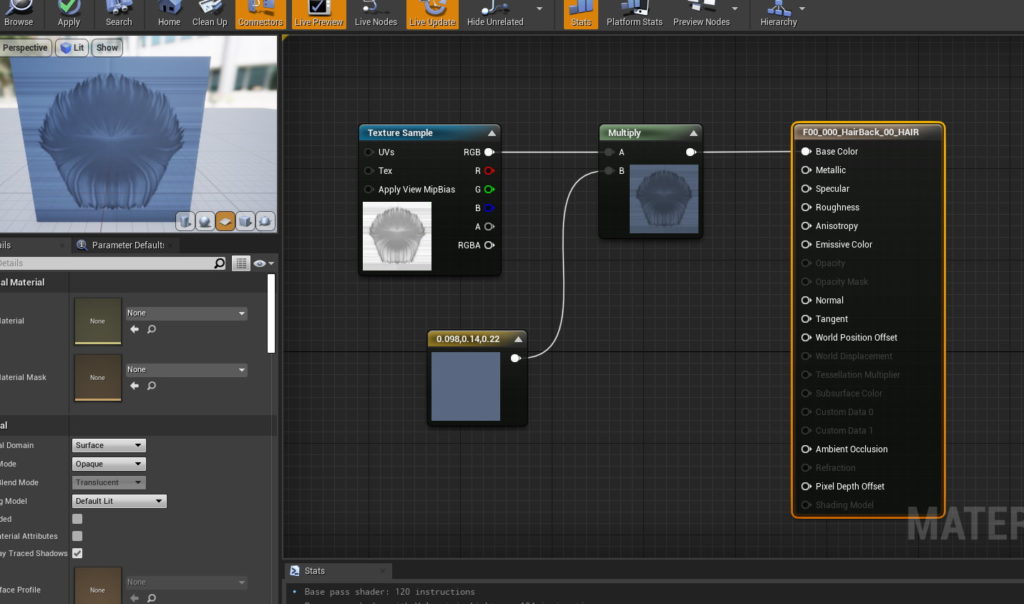
F00_000_HairBack_00_HAIR is once again the same however this time you can leave the result node Blend Mode as its default Opaque:
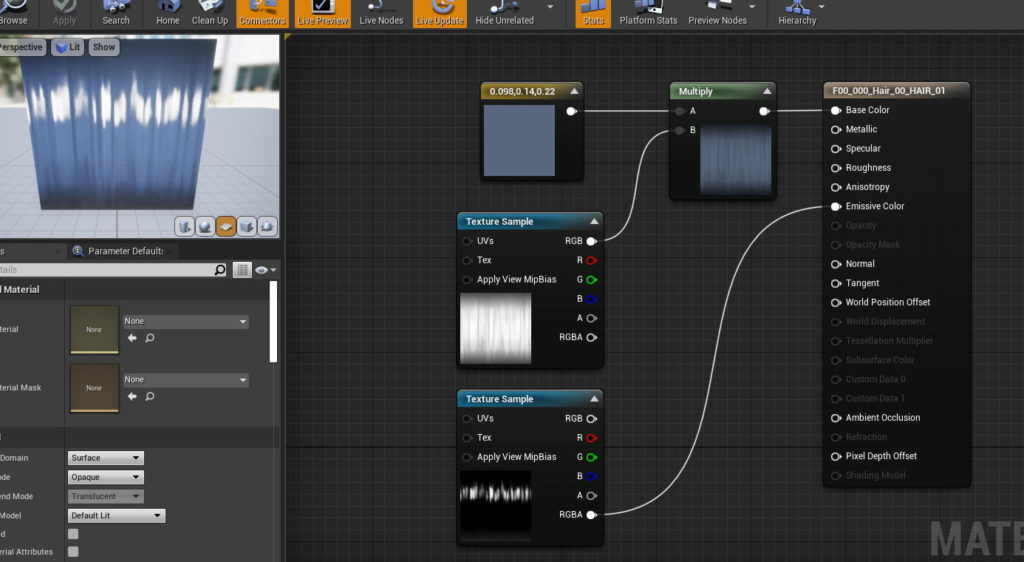
For your main hair material F00_000_Hair_00_01, you’ll first need to import the normal and specular map assets. Open the folder your VRM was in and you’ll notice a new tex_* folder. This was created while generating atlas materials earlier. Inside will be F00_000_Hair_00_nml.png and F00_000_Hair_00_spe.png files. Drag those into your UE content browser where the rest of your textures are. Now open up the F00_000_Hair_00_01 material.
- Multiply the input Texture Sample by your hair colour as done above.
- Create a Texture Sample node and set the texture to your newly imported specular map. Plug it into the Emissive Color pin.
Take a look back at the actor you dragged into your scene at the start and she should be looking like she’s finally ready for whatever adventures you have in store for her.
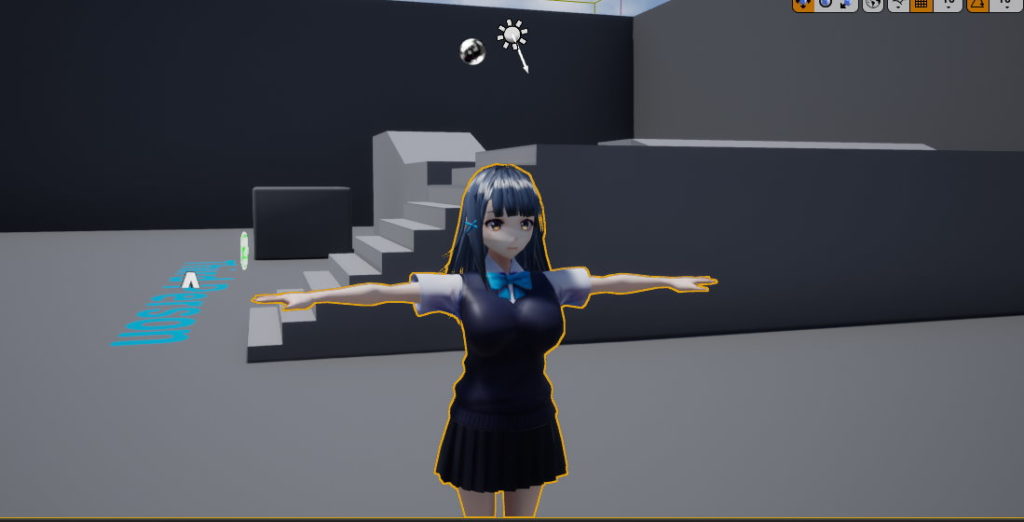
And with that we’re done! This process was pretty cumbersome and took a lot of time to work out. If you know of a better or more streamlined way of completing this task please let me know in the comments below!
4 – Bonus Content
While working through this whole process I decided to try making a quick animation in Blender to confirm Cats was correctly setting up the models rig and UE would in turn be able to play its animation.
Behold. My first ever animation. You’re welcome.