Isn’t it annoying when you want to connect to your home network while out and about but don’t know what your IP is? Sick of dynamic DNS sites with arbitrary restrictions on their free tiers? Well look no further! This tutorial demonstrates how to point your home IP to a subdomain of your website using a simple PHP script.
The Concept
- Set up a Route 53 subdomain for pointing to your home
- A device in your home uses a scheduled task to ping a URL on your website
- That URL grabs the IP hitting it and points your subdomain to the IP.
Step 1: Set up an IAM User
To use the AWS API, we’ll need an IAM user profile with relevant permissions.
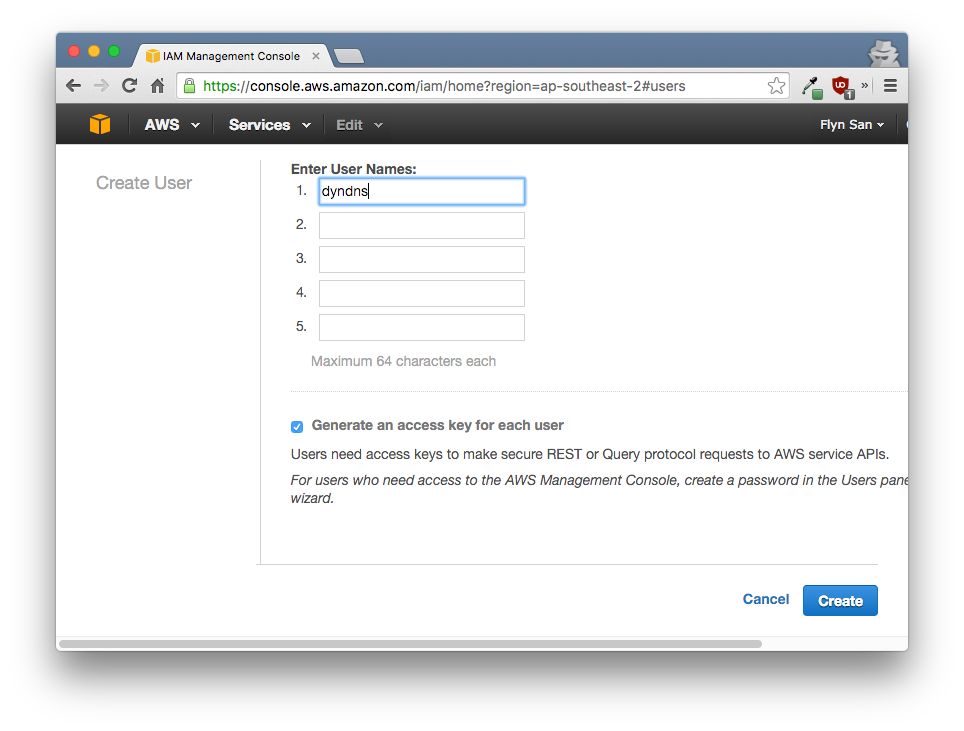
Log in to the AWS management console and go to Services – IAM – Users and click Create New Users. Name the user dyndns and click Create.
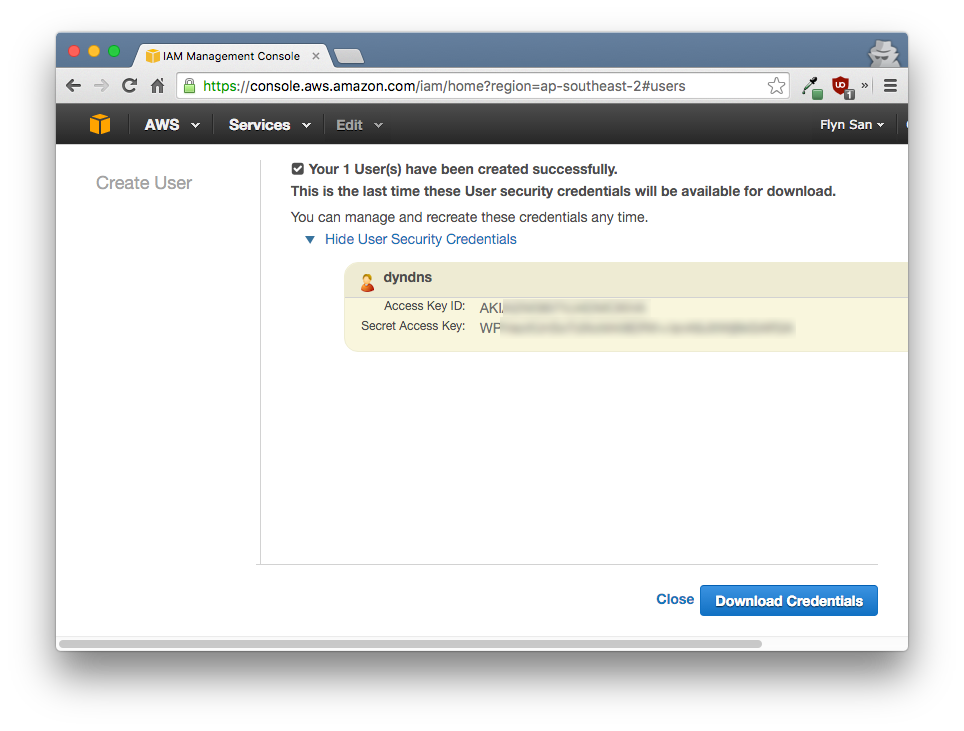
You’ll be given an access and secret key. These are used to authenticate the API calls our script will be making. Log in to your web server and create the file /var/www/yoursite.com/.aws/credentials or any path readable by your web server. Inside place your keys like so:
1 2 3 | [dyndns] aws_access_key_id = your_access_key_here aws_secret_access_key = your_secret_key_here |
Click Close twice then click your new dyndns user to open it up. We have your user created but it still doesn’t have permission to modify Route 53 routes.
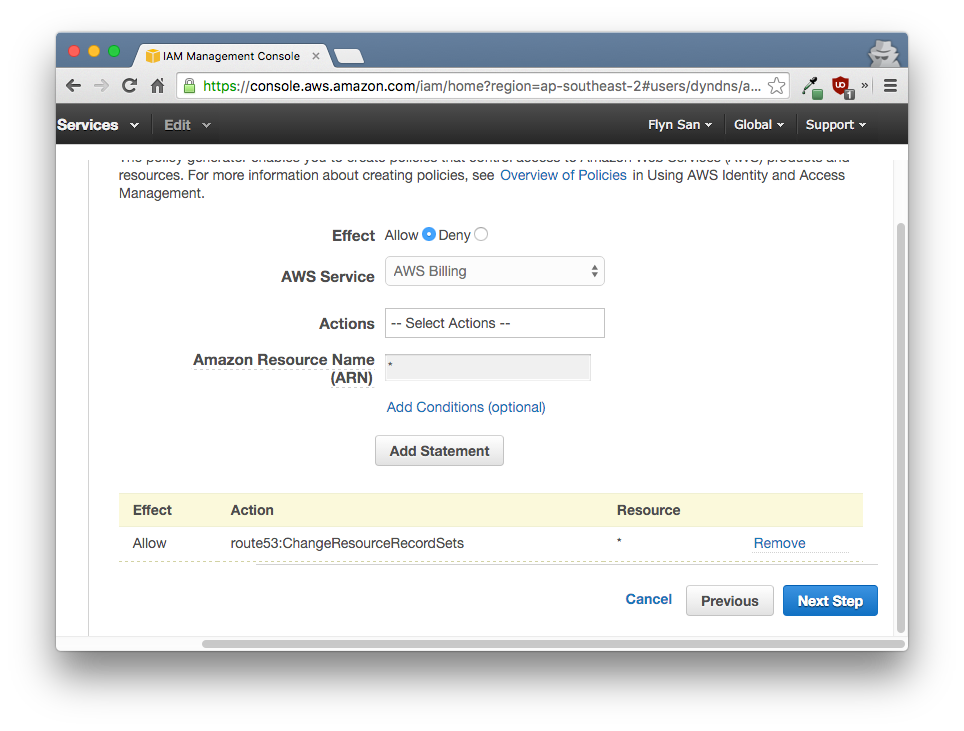
Go to the Permissions tab and inside Inline Policies click the click here link to bring up the policy generator. Click Select under Policy Generator and set the following values:
- Effect: Allow
- AWS Service: Amazon Route 53
- Actions: ChangeResourceRecordSets
- Amazon Resource Name (ARN): *
Finally, click Add Statement, Next Step and Apply Policy. If you did things correctly, your policy should look something like so:
1 2 3 4 5 6 7 8 9 10 11 12 13 14 15 | { "Version": "2012-10-17", "Statement": [ { "Sid": "Stmt144999860000", "Effect": "Allow", "Action": [ "route53:ChangeResourceRecordSets" ], "Resource": [ "*" ] } ] } |
Step 2: Set up your Route 53 Subdomain
We need a subdomain to point towards our home. For this tutorial, I’ll call the subdomain home.
In AWS Management Console go to Services – Route 53 – Hosted Zones – and pick the domain you want to use. Take note of the Hosted Zone ID of this domain – you’ll need that later.
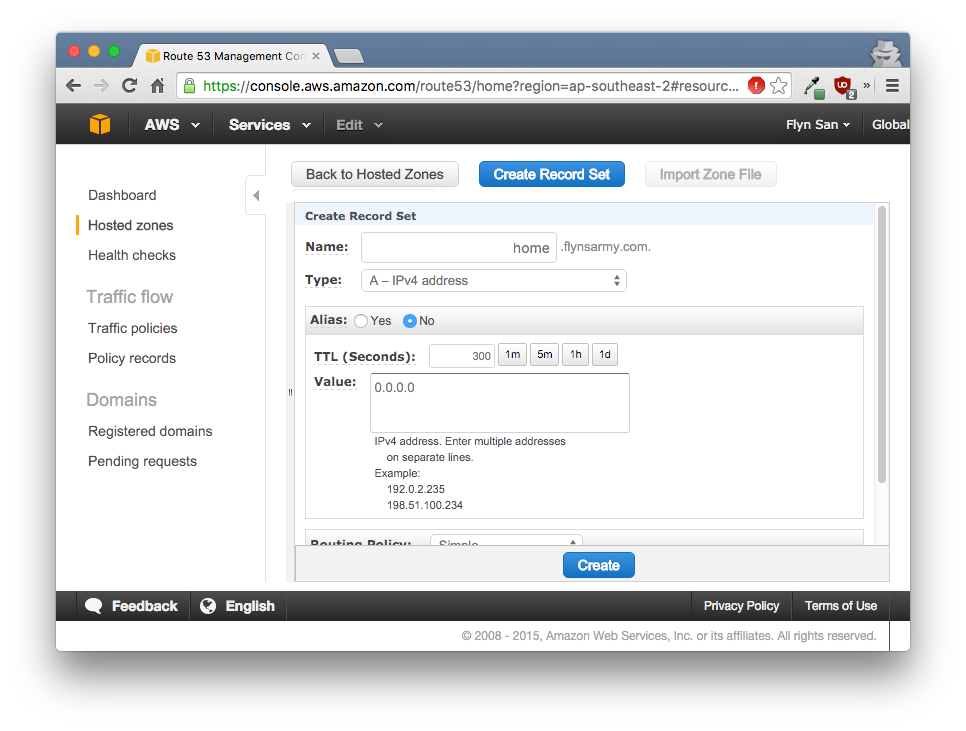
Click Create Record Set and add the following details:
- Name: home
- Type: A – IPv4 address (Or AAAA if using IPv6)
- TTL (Seconds): 300
- Value: 0.0.0.0
Note: Don’t worry that 0.0.0.0 isn’t your correct home IP – this value was used so we can see if the script is working correctly later on.
Click Create.
Step 3: Install the Dynamic DNS Script
In webroot on your web server for the same site as the domain you picked above, do the following:
1 2 3 | mkdir dyndns && cd dyndns composer require aws/aws-sdk-php monolog/monolog touch index.php |
Open up your new index.php file and add the following updating the $credentialsPath, $zoneId and $recordName variables:
1 2 3 4 5 6 7 8 9 10 11 12 13 14 15 16 17 18 19 20 21 22 23 24 25 26 27 28 29 30 31 32 33 34 35 36 37 38 39 40 41 42 43 44 45 46 47 48 49 50 51 52 53 54 55 56 57 58 59 60 61 62 63 64 65 66 67 68 69 70 71 72 73 74 75 76 77 78 79 80 81 82 83 84 85 86 87 88 89 90 91 92 | <?php header("Cache-Control: no-cache, must-revalidate"); // HTTP/1.1 header("Expires: Sat, 26 Jul 1997 05:00:00 GMT"); // Date in the past $credentialsPath = '/var/www/yoursite.com/.aws/credentials'; $zoneId = 'your_zone_id'; $recordName = 'home.yoursite.com.'; //The dot at the end is required $profile = 'dyndns'; $ip = get_ip(); require_once __DIR__.'/vendor/autoload.php'; use Aws\Credentials\CredentialProvider; use Aws\Exception\CredentialsException; use Aws\Route53\Route53Client; use Aws\Route53\Exception\Route53Exception; use Monolog\Logger; use Monolog\Handler\StreamHandler; // Set up the logger - https://github.com/Seldaek/monolog $logger = new Logger('flyndns'); $logger->pushHandler(new StreamHandler( __DIR__.'/flyndns.log', Logger::DEBUG )); // If your web server runs under a different user to you, it won't // be able to read the ~/.aws/credentials file created with aws configure. // So specify the file to read manually. // https://serverfault.com/a/714220 $provider = CredentialProvider::ini($profile, $credentialsPath); $provider = CredentialProvider::memoize($provider); // Set up the route 53 client - https://docs.aws.amazon.com/aws-sdk-php/v3/guide/getting-started/basic-usage.html#usage-summary $client = new Route53Client([ 'version' => 'latest', 'region' => 'us-east-1', // route 53 requires this region 'credentials' => $provider, ]); try { // Do the DNS updating. Requires // - $recordName - e.g 'home.yourdomain.com.' Include the trailing dot character. // - $zoneId - the ID of your hosted zone // - $ip - Your new IP address. Change 'Type' below to 'AAAA' if using IPv6. // // https://docs.aws.amazon.com/aws-sdk-php/v3/api/api-route53-2013-04-01.html#changeresourcerecordsets // https://docs.aws.amazon.com/Route53/latest/APIReference/API_ChangeResourceRecordSets_Requests.html#API_ChangeResourceRecordSets_RequestBasicSyntax $result = $client->changeResourceRecordSets([ 'ChangeBatch' => [ 'Changes' => [ [ 'Action' => 'UPSERT', // UPSERT will update or insert as required 'ResourceRecordSet' => [ 'Name' => $recordName, 'Type' => 'A', // Change to AAAA for ipv6 'TTL' => 300, 'ResourceRecords' => [ [ 'Value' => $ip, ], // ... ], ], ], ], 'Comment' => 'DynDNS Home IP', ], 'HostedZoneId' => $zoneId, ]); } catch (Route53Exception $e) { $logger->addError($e->getAwsErrorCode() . ': ' . $e->getMessage()); exit("A '".$e->getAwsErrorCode()."' error occurred. Please check the log file for details."); } catch (CredentialsException $e) { $logger->addError("Invalid AWS credentials provided."); exit("Invalid AWS credentials provided: " . $e->getMessage()); } $logger->addInfo("IP updated to " . $ip); exit("IP updated successfully. New IP: " . $ip); function get_ip() { $ip = ''; if ( !empty($_SERVER['HTTP_X_FORWARDED_FOR']) ) $ip = $_SERVER['HTTP_X_FORWARDED_FOR']; elseif ( isset($_SERVER['HTTP_CF_CONNECTING_IP']) ) $ip = $_SERVER['HTTP_CF_CONNECTING_IP']; elseif ( isset($_SERVER['REMOTE_ADDR']) ) $ip = $_SERVER['REMOTE_ADDR']; return $ip; } |
Hit the new /dyndns URL in your browser. If all went well, you should get
IP updated successfully. New IP: <your ip here>
Step 4: Link up your Home with the Script
At your home you’ll need to set up a scheduled task to hit the new /dyndns URL. This can be done on a PC, a NAS device or even your router if it supports such a thing. A simple hourly curl http://yoursite.com/dyndns command will suffice.
Final Thoughts
You may want to add some sort of auth code to the script so not just anyone can hit your /dyndns URL and point it who knows where. Something like the following will suffice:
1 2 | if ( empty($_GET['code']) || $_GET['code'] != 'my_special_code' ) exit; |
You’ll then just need to update your cron job to curl http://yoursite.com/dyndns/?code=my_special_code


