Posted (Updated ) in Linux

This morning I noticed one of my drives wasn’t mounted so I attempted to mount manually and got the following error message:

$ sudo mount /dev/sdi1 /mnt/my_drive/

mount: wrong fs type, bad option, bad superblock on /dev/sdi1,
missing codepage or helper program, or other error
In some cases useful info is found in syslog – try
dmesg | tail or so

Strange. Following the messages advice I checked out dmesg:

$ dmesg | tail

[ 213.962722] EXT4-fs (sdi1): no journal found


The Solution

If this happens to you, you can ignore the error and mount in readonly mode using the following command:

sudo mount -o loop,ro,noexec,noload /dev/sdi1 /mnt/your_broken_partition/

Thanks to Computer Forensics for their useful post on this issue.

ALWAYS BACKUP YOUR DATA

Read More »

Posted (Updated ) in Linux

The below is a collaboration of useful information I’ve found while attempting to build and maintain a RAID5 array consisting of 4 HDDs. This tutorial is a work in progress and I’m learning everything as I go. I’ve left relevant links in each section for more information and if you spot anything that could be done better or that I’m missing let me know in the comments below!

Read More »

Posted (Updated ) in Linux

So I don’t forget, here’s a tutorial on installing the RocketRaid 2760a drivers and management utilities on Ubuntu 12.10. I’m using 64-bit but 32-bit should be the same – just substitute where appropriate.

Installing the Driver

The installation disc comes with an out of date version of the driver and kernel module. The way the installation works, we need to download and compile the kernel module then download the driver installer, drop the module into place and run the installer. Make sure you have appropriate compiler tools installed – to be safe just run

sudo apt-get install ubuntu-dev-tools

Download and extract the ones with kernel 3.x support from the HighPoint website:

mkdir ~/driver
cd ~/driver
# driver
wget http://www.highpoint-tech.com/BIOS_Driver/RR276x/linux/Ubuntu/rr276x-ubuntu-11.10-x86_64-v1.1.12.0502.tgz
tar -xvzf rr276x-ubuntu-11.10-x86_64-v1.1.12.0502.tgz
# kernel module
mkdir module
cd module
wget http://www.highpoint-tech.com/BIOS_Driver/RR276x/linux/RR276x-Linux-Src-v1.1-120424-1734.tar.gz
tar -xvzf  RR276x-Linux-Src-v1.1-120424-1734.tar.gz

Build and compress the kernel module for our driver installer:

cd rr276x-linux-src-v1.1/product/rr276x/linux/
make
# Ignore the warning about not being able to find him_rr2760x.o...doesn't seem to matter
gzip rr276x.ko
mv rr276x.ko.gz ~/driver/boot/rr276x$(uname -r)$(uname -m).ko.gz

And finally install the driver

cd ~/driver
sudo bash preinst.sh

This step succeeded! Now you can press ALT+F1 to switch back to the installation screen!

sudo bash install.sh

Update initrd file /boot/initrd.img-3.5.0-17-generic for 3.5.0-17-generic
Please reboot the system to use the new driver module.

sudo shutdown -r now

That should be everything! You can now test with

cat /proc/scsi/rr276x/*


Installing the RAID Management Software

Annoyingly the RAID management console is difficult to install to say the least. The GUI deb packages error when trying to install and HighPoint don’t even provide a deb for the command line version and to top it off the version of the command line utility on the driver CD is newer than the version on their site! For this reason I’ve provided the newer command line RPMs here.

Let’s get this thing installed.

Web version:

mkdir ~/driver/utility
mkdir ~/driver/utility/console
mkdir ~/driver/utility/web
cd ~/driver/utility/web
echo "rr276x" | sudo tee -a /etc/hptcfg > /dev/null
wget http://www.highpoint-tech.com/BIOS_Driver/GUI/linux/WebGui/WebGUI-Linux-v2.1-120419.tgz
tar -xzvf WebGUI-Linux-v2.1-120419.tgz
sudo apt-get -y install alien
sudo alien -d hptsvr-https-2.1-12.0419.$(uname -m).rpm
sudo dpkg -i hptsvr-https_2.1-13.0419_amd64.deb


Command Line version:

cd ~/driver/utility/console
wget https://www.flynsarmy.com/wp-content/uploads/2012/11/LinuxRaidUtilityConsole.tar.gz
sudo alien -d hptraidconf-3.5-1.$(uname -m).rpm
sudo alien -d hptsvr-3.13-7.$(uname -m).rpm
sudo dpkg -i hptraidconf_3.5-2_amd64.deb

Run the web server:

sudo hptsvr

You should now be able to connect to it from your browser by navigating to http://localhost:7402 with username RAID and password hpt.


Further Reading

HOWTO: Get GUI hptsvr & hptraid 3.13 working on Ubuntu
HighPoint driver download page for RocketRaid 2760a

Read More »

Posted in Linux

The below is a quick guide to creating partitions on a newly purchased, unformatted disk. For this guide I’ll be formatting a new WD 2TB Black.


Find the disk you want to partition

# lsblk

NAME MAJ:MIN RM SIZE RO TYPE MOUNTPOINT
sda 8:0 0 55.9G 0 disk
├─sda1 8:1 0 53.6G 0 part /
├─sda2 8:2 0 1K 0 part
└─sda5 8:5 0 2.3G 0 part [SWAP]
sdb 8:16 0 1.8T 0 disk
sdc 8:32 0 1.8T 0 disk

Partitions appear as subitems. Notice sdb and sdc have no partitions – those are the disks I want to format.


Create the partition

# sudo fdisk /dev/sdb

Device contains neither a valid DOS partition table, nor Sun, SGI or OSF disklabel
Building a new DOS disklabel with disk identifier 0xd3e43840.
Changes will remain in memory only, until you decide to write them.
After that, of course, the previous content won’t be recoverable.

Warning: invalid flag 0x0000 of partition table 4 will be corrected by w(rite)

Command (m for help):

Below I’m using the default values to create one large partition for the whole disk.

n

Partition type:
p primary (0 primary, 0 extended, 4 free)
e extended

Select (default p):
Using default response p
Partition number (1-4, default 1):
Using default value 1
First sector (2048-3907029167, default 2048):
Using default value 2048
Last sector, +sectors or +size{K,M,G} (2048-3907029167, default 3907029167):
Using default value 3907029167

Command (m for help):

All done? Write!

w

The partition table has been altered!

Calling ioctl() to re-read partition table.
Syncing disks.

That’s all for partitioning! Take a gander at your fancy new partitions:

# lsblk

NAME MAJ:MIN RM SIZE RO TYPE MOUNTPOINT
sda 8:0 0 55.9G 0 disk
├─sda1 8:1 0 53.6G 0 part /
├─sda2 8:2 0 1K 0 part
└─sda5 8:5 0 2.3G 0 part [SWAP]
sdb 8:16 0 1.8T 0 disk
└─sdb1 8:17 0 1.8T 0 part
sdc 8:32 0 1.8T 0 disk
└─sdc1 8:33 0 1.8T 0 part


Format to NTFS

I’m choosing a quick format. You may choose instead to remove the -f argument for a proper one instead.

# sudo mkntfs -f /dev/sdb1

Cluster size has been automatically set to 4096 bytes.
Creating NTFS volume structures.
mkntfs completed successfully. Have a nice day.


Optional: Name the drives

Because I’m running NTFS I can give the drives labels. Make sure you have ntfsprogs installed then enter:

# sudo ntfslabel -f /dev/sdb1 YourLabel


More Information

For more information on partitioning check out Chris Wakefield’s post here.
For a short and sweet howto on  formatting as NTFS check here.
Information on NTFS labels here.

Read More »
Posted in Linux

If you’re a Ubuntu user, you may be familiar with ppa-purge. It’s a handy little automated script to remove a PPA and roll back the version of any apps installed from that PPA. Debian doesn’t have this nicety by default but there’s a relatively simple way to get something close.

Firstly, remove your PPA from /etc/apt/sources.list or from the /etc/apt/sources.list.d/ directory.

Do an update:

1
sudo apt-get update

Find any packages that are now obsolete:

1
aptitude search '?obsolete'

For me this returned the following:

# aptitude search '?obsolete'
i A libmysqlclient18      - MySQL database client library                                                                           
i A mysql-client-5.5      - MySQL database client binaries                                                                          
i A mysql-server-5.5      - MySQL database server binaries and system database setup                                                
i A mysql-server-core-5.5 - MySQL database server binaries                                                                          
i A ruby-passenger        - Rails and Rack support for Apache2 and Nginx

Now just remove the listed packages with apt-get remove and reinstall as necessary. It’s not quite the automated tool that ppa-purge is, but it’s a pretty good start.

Read More »

Posted in Linux

I’ve been getting alot of frozen messages with Exim and needed to find out what they were so figured I’d document a few handy commands for doing so:

List messages in queue:

1
exim -bp

Show message header/body:

1
2
exim -Mvh <id> #For header
exim -Mvb <id> #For body

Delete all messages in queue:

1
exim -bp | exiqgrep -i | xargs exim -Mrm

Read More »

Posted (Updated ) in Linux

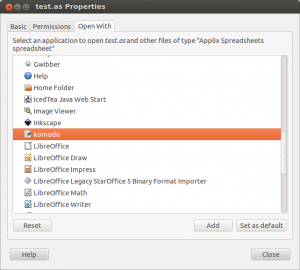
It seems Gnome 3 removed the button allowing users to add specified applications into the ‘Other Applications’ list under ‘Open With’ in file properties. Until the functionality is restored, you can add applications manually by doing the below:

cp /usr/share/applications/gedit.desktop ~/.local/share/applications/your_app.desktop

Modify the contents of your_app.deskop to look something like the below:

[Desktop Entry]
Name=your_app
GenericName=Your App
Comment=Edit text files
Keywords=Plaintext;Write;
Exec=your_app %U
Terminal=false
Type=Application
StartupNotify=true
MimeType=text/plain;
Icon=/path/to/icon.png
Categories=GNOME;GTK;Utility;TextEditor;
Actions=Window;Document;
X-Ubuntu-Gettext-Domain=your_app

You can copy any .desktop file from /usr/share/applications so pick the one that closest resembles the application you’re adding. Below you can see komodo added to mine:

Komodo has been added to my 'Open With' list
Komodo has been added to my ‘Open With’ list

Read More »

Posted (Updated ) in Linux, PHP

I’ve been seeing up an Amazon EC-2 server with Debian Squeeze and used tasksel to install Web Server and Mail Server. Like all things debian, this worked pretty well after the installation completed and everything ‘just worked’ however I wasn’t happy with the default from name and email address assigned to emails sent by PHP – www-data <www-data@my.domain.com>.

I discovered a quick and simple fix to change these defaults for all mail sent with PHP:

Open /etc/php5/apache2/php.ini and set

sendmail_path = '/usr/sbin/sendmail -t -i -fno-reply@my.domain.com -Fno-reply'

You can see a list of sendmail arguments and what they do here.

Restart apache and you’re good to go:

sudo service apache2 restart

Read More »

Posted in Linux, PHP

I’ve been looking for ways to speed up my site recently and came across this interesting article on seamlessly integrating nginx with Apache to handle asset files without requiring a CDN subdomain. This works by checking the requests file extension for .js, .jpg, .pdf etc and if not found, proxies the request to Apache and serves the results.

Benefits

You won’t need to modify all your pages/posts updating asset locations to point to a subdomain! Everything will ‘just work’.

Issues/Drawbacks

There are 2 issues I’ve found with this setup:

  • Because Apache is now running on port 8080, your mod_rewrite redirects will now redirect to that port. You won’t be able to use RedirectMatch anymore, however below is the solution I came up with:
    sudo apt-get install nginx
    sudo nano/etc/nginx/sites-available/default
  • You can no longer use .htaccess redirects for any asset files nginx is serving. Instead, use nginx redirects. Below is an example:
    1
    2
    3
    4
    5
    6
    7
    8
    9
    10
    11
    12
    13
    14
    15
    16
    17
    18
    19
    20
    21
    22
    23
    24
    25
    26
    27
    28
    29
    30
    31
    32
    33
    34
    35
    36
    37
    38
    39
    40
    41
    42
    43
    44
    45
    46
    47
    48
    49
    50
    51
    52
    53
    
    # You may add here your
    # server {
    #	...
    # }
    # statements for each of your virtual hosts
     
    server {
     
    	listen   80; ## listen for ipv4
    	listen   [::]:80 default ipv6only=on; ## listen for ipv6
     
    	server_name  localhost;
    	root /var/www/; 
    	access_log  /var/log/nginx/localhost.access.log;
     
    	# Static Contents
    	location ~* ^.+.(jpg|jpeg|gif|png|ico|css|zip|tgz|gz|rar|bz2|doc|xls|exe|pdf|ppt|txt|tar|mid|midi|wav|bmp|rtf|js)$ {		access_log off;
    		expires 30d;
    	}
     
    	# Dydamic Content forward to Apache
    	location / {
            	proxy_set_header X-Real-IP  $remote_addr;
    	        proxy_set_header Host $host;
            	proxy_set_header X-Forwarded-For $proxy_add_x_forwarded_for;
    	        proxy_pass http://127.0.0.1:8080;	}
    }
     
    ###############################################################################
    # virtualhost
    ###############################################################################
     
    #server {
    #    server_name www.example.com example.com;
    #    root /var/www/example.com/html/;
    #
    #    # Static Contents
    #    location ~* ^.+.(jpg|jpeg|gif|png|ico|css|zip|tgz|gz|rar|bz2|doc|xls|exe|pdf|ppt|txt|tar|mid|midi|wav|bmp|rtf|js)$ {
    #        access_log off;
    #        expires 30d;
    #    }
    #
    #    # Dydamic Content forward to Apache
    #    location / {
    #        proxy_set_header X-Real-IP  $remote_addr;
    #        proxy_set_header Host $host;
    #        proxy_set_header X-Forwarded-For $proxy_add_x_forwarded_for;
    #        proxy_pass http://127.0.0.1:8080;
    #    }
    #}

    For more information on nginx redirects, see the official documentation.

Read More »

Posted (Updated ) in Linux

A couple of times now we’ve needed to forward foo@oursite.com to my@gmail.com. If you’re running postfix here’s how to do that.

nano /etc/postfix/virtual

Add

from@email.com to@email.com

then run

postmap /etc/postfix/virtual

If the above doesn’t work, make sure you have the following line in /etc/postfix/main.cf:

virtual_alias_maps = hash:/etc/postfix/virtual

and type

service postfix reload

Thanks to Matt Simmons of ServerFault for his answer.

Read More »